Step-by-step instructions for making your own Scratch+micro:bit examples, which have been thoughtfully designed to inspire your participants to start creating!
How to use these examples
When preparing to facilitate a creative learning activity, it is important to think carefully about how you're setting up the learning environment. One very important component of this set-up is populating your space with a variety of example projects.
During your workshop, make these examples available to your participants by setting them up as demo stations in your work space. This allows participants to use the examples as a reference if they’re looking for inspiration, have a question, or choose to examine them.
As a facilitator, it is important to avoid walking your participants through every step that went into making an example or having every participant make one of the examples. Simply introduce the workshop prompt or theme, and let people dive right in!
And remember, as a facilitator, you don’t have to have all the answers. Good examples can help with troubleshooting and questions from your participants, so don’t be afraid to refer someone to an example (or a peer’s project) if they’re stuck!
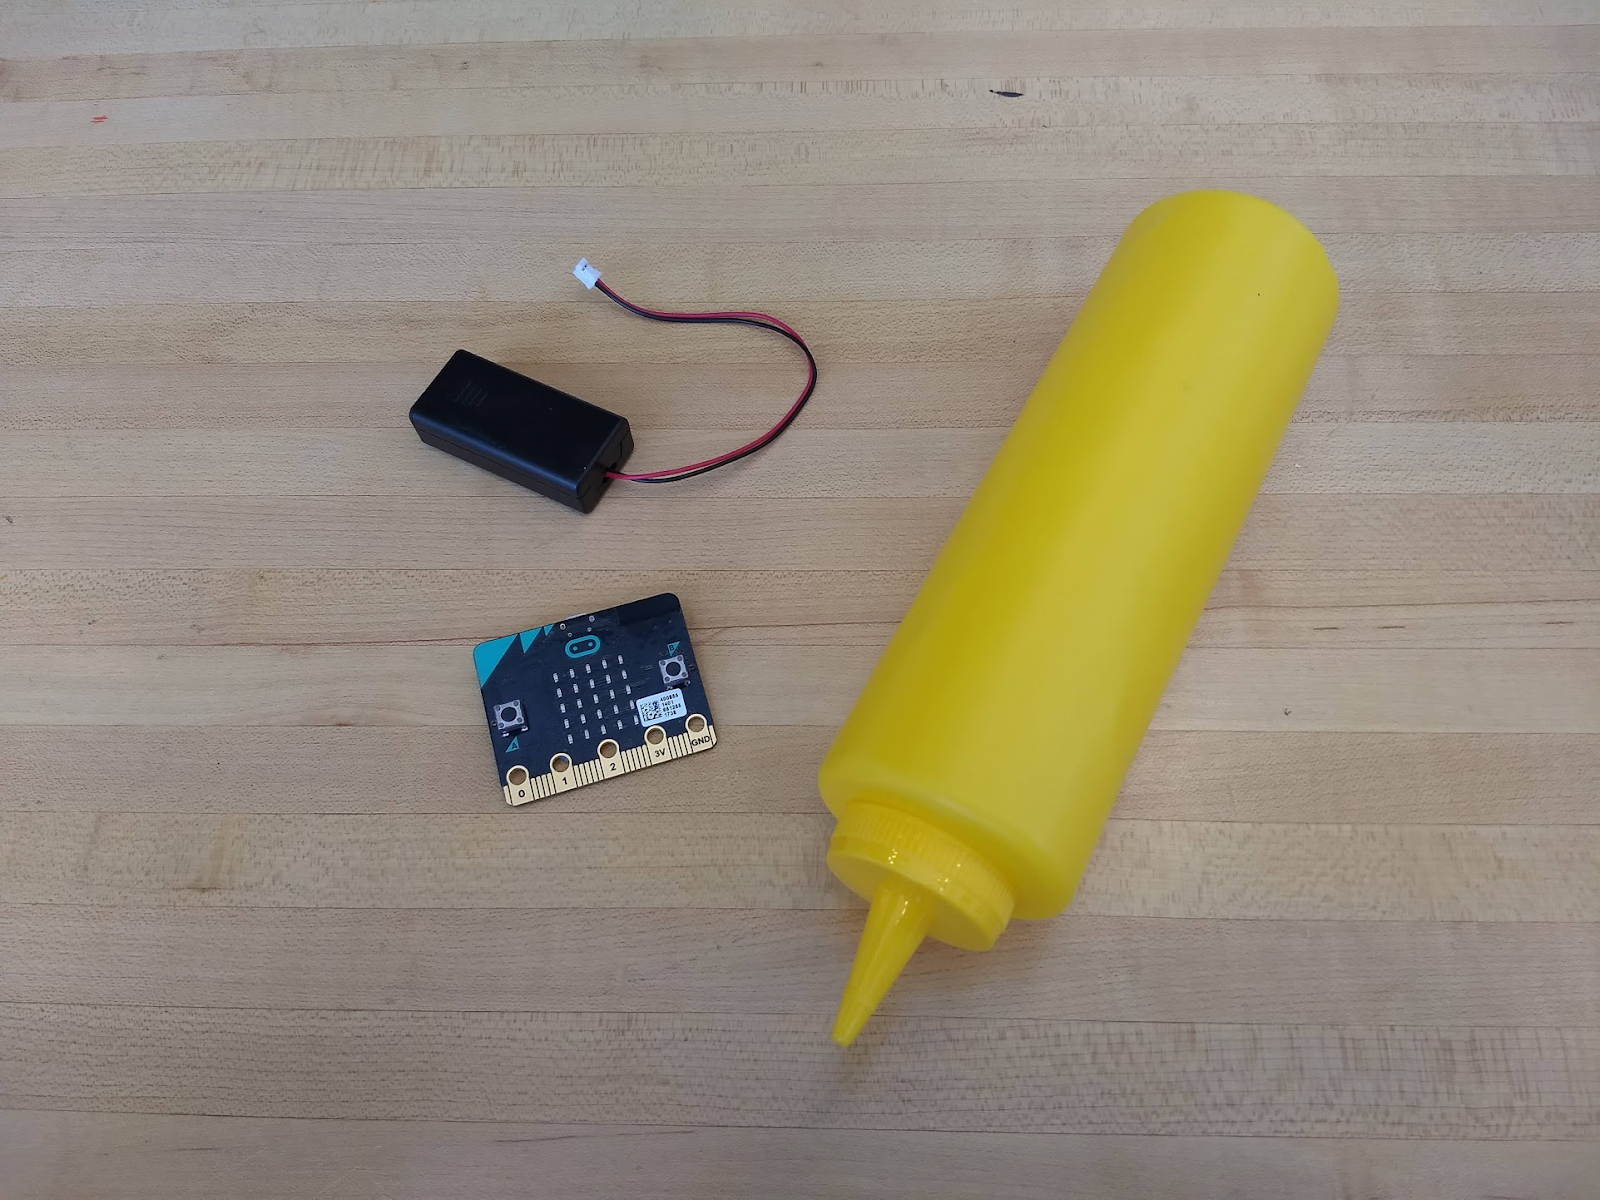
1. Fun with Enchanted Objects
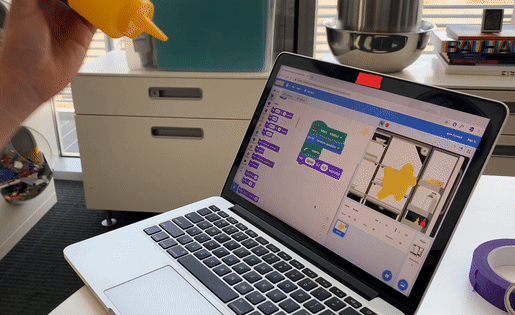
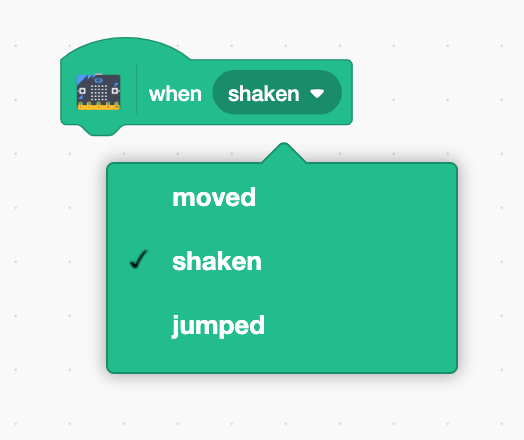
What we like about this example: This is a simple and fun example designed to inspire your participants and showcase what is possible with Scratch + micro:bits! This project utilizes the micro:bit sensors that can detect movement and shaking.
Materials needed: To make this example, you’ll need one micro:bit & battery pack, a computer, masking tape, and a mustard (or ketchup) bottle!
The Scratch project that controls this enchanted object can be found here, for your reference: scratch.mit.edu/projects/311339992/editor/
Instructions ↓

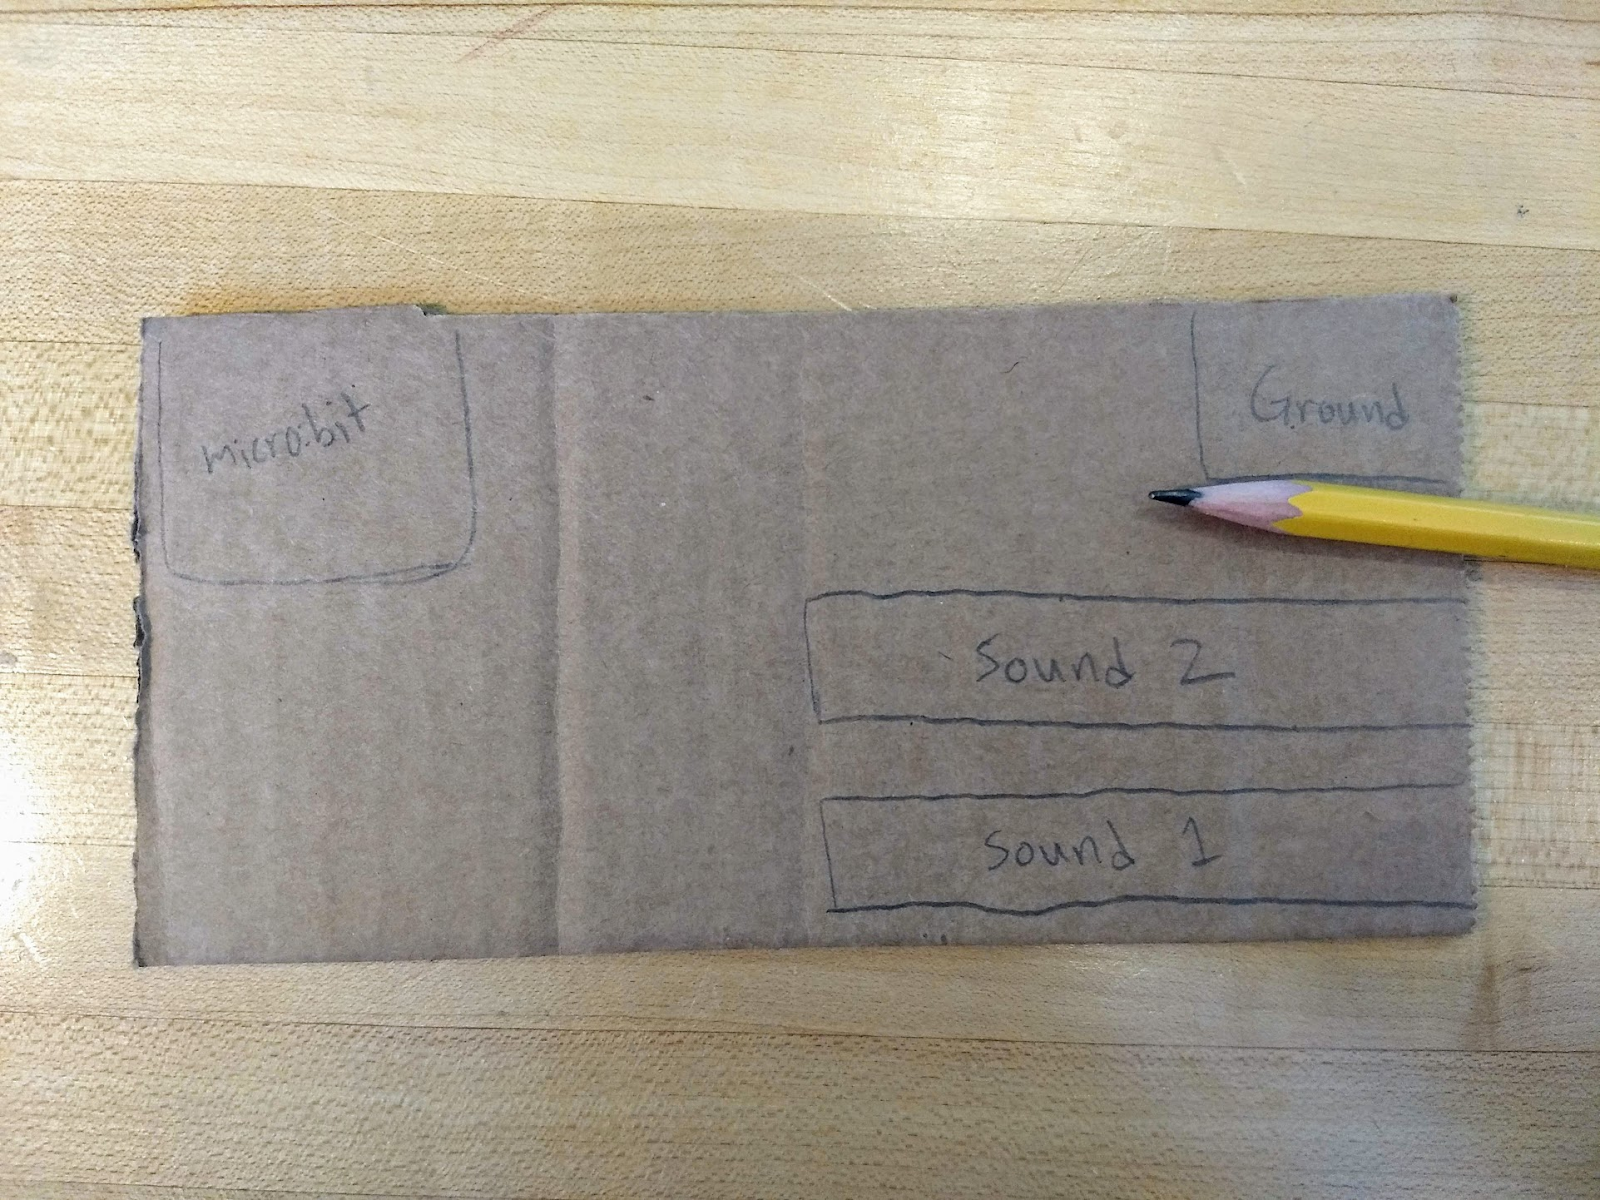
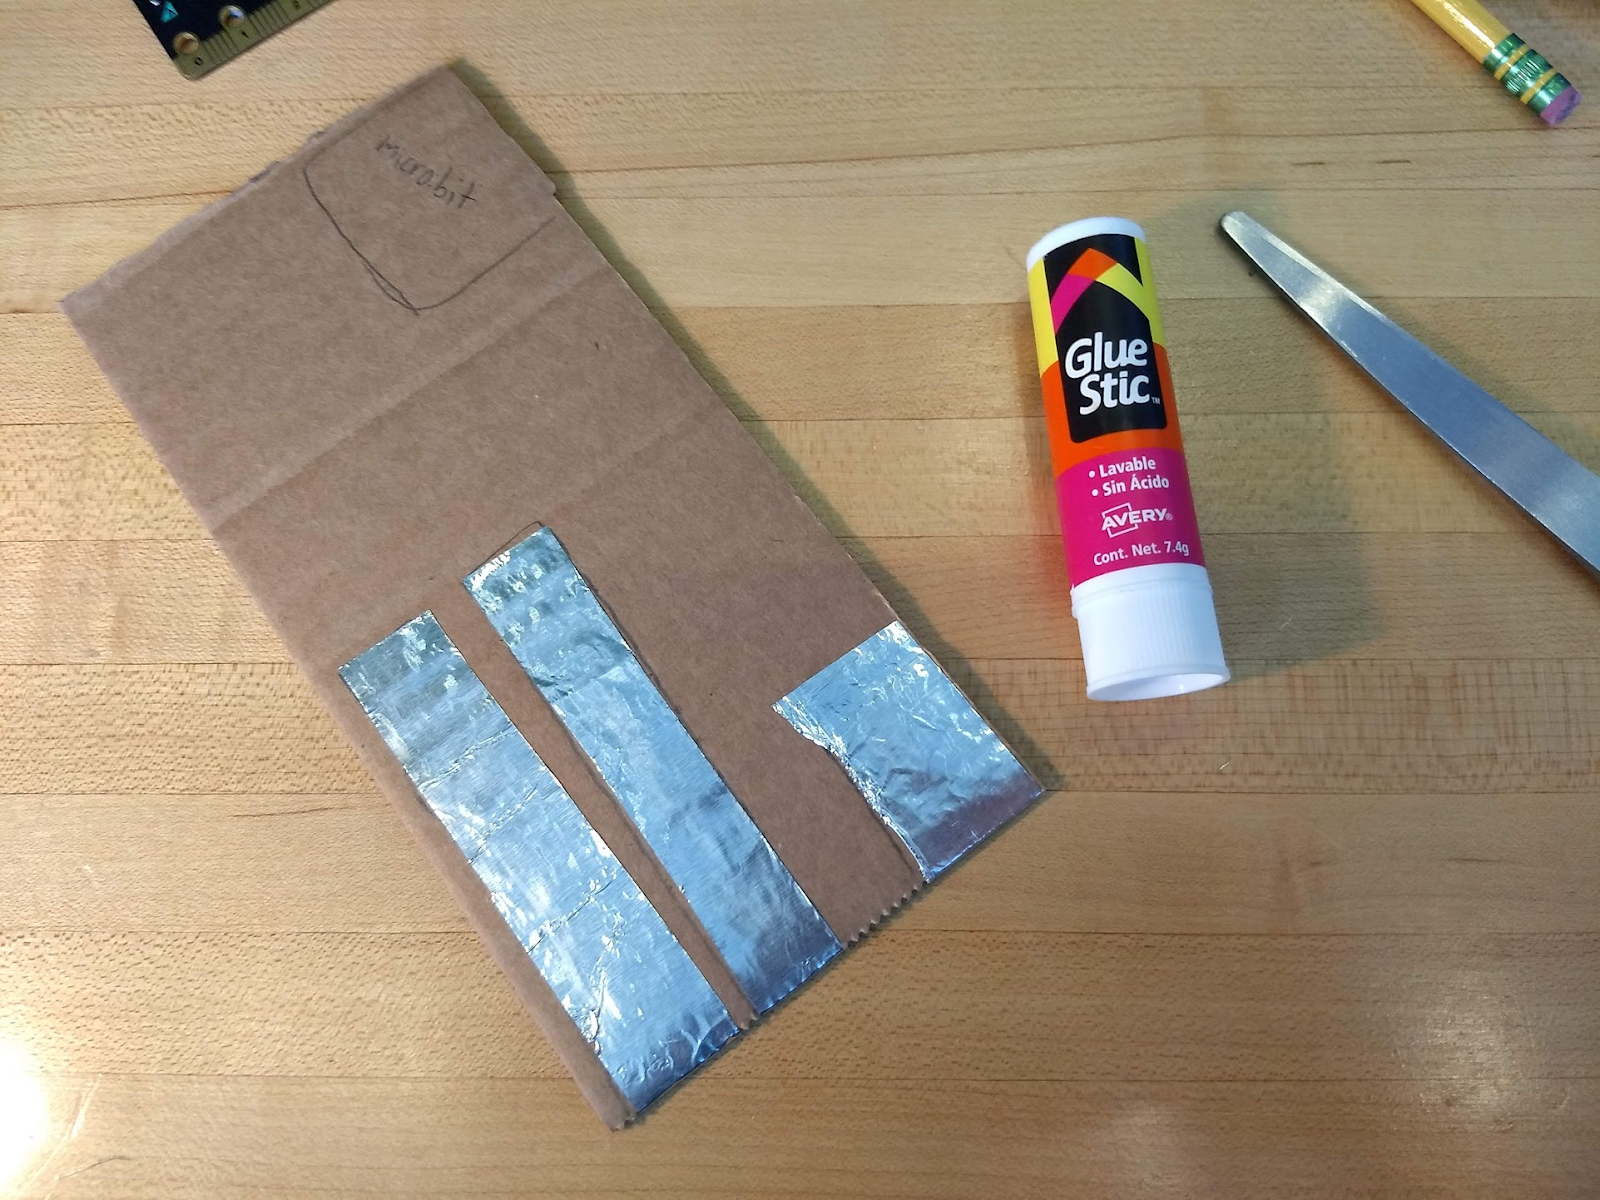
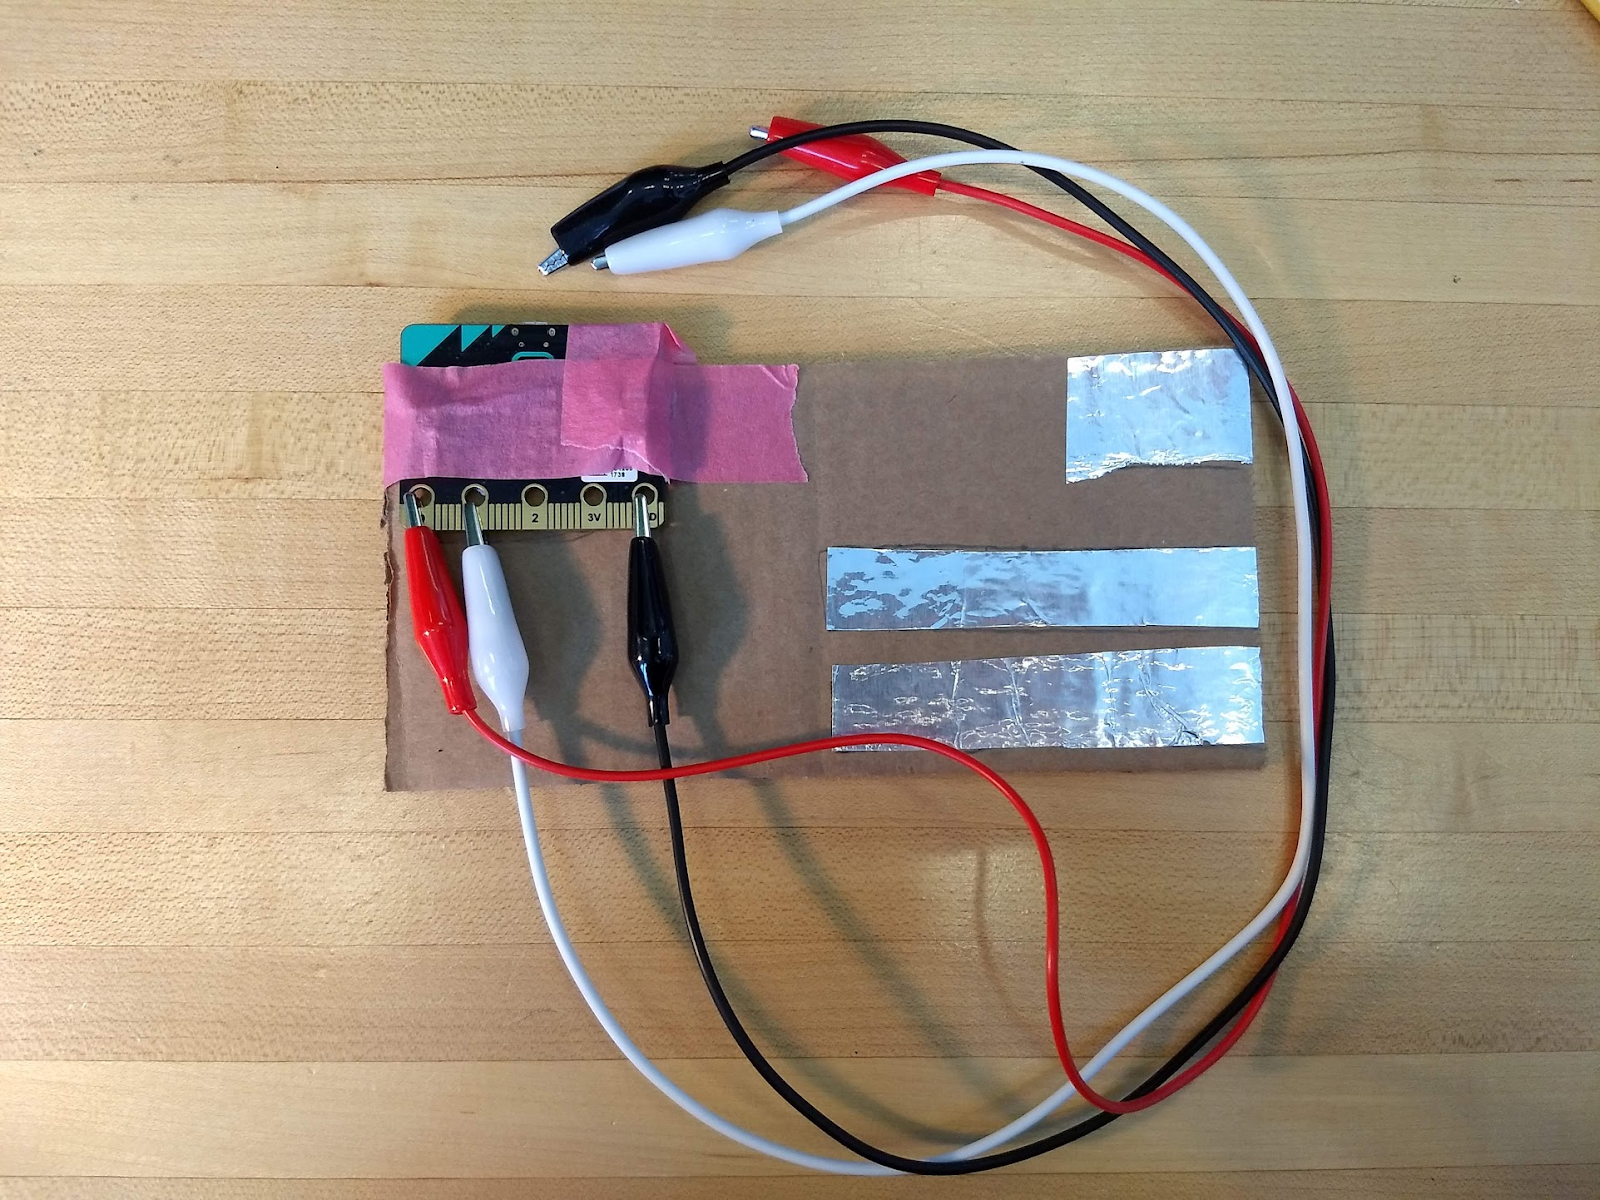
2. Cardboard Musical Instrument
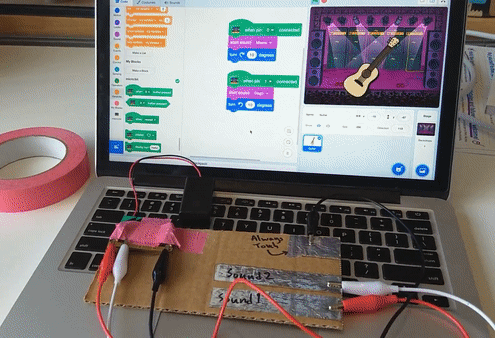
What we like about this example: This example shows how a participant might utilize the micro:bit pins to interact with Scratch projects.
Materials needed: To make this example, you’ll need one micro:bit & battery pack, a computer, cardboard, alligator clips, aluminum foil, masking tape, scissors, a glue stick, and something to write with!
The Scratch project that controls this cardboard instrument can be found here, for your reference: scratch.mit.edu/projects/311336786/editor/


Instructions ↓


3. Other starter examples
You can find other examples on the Scratch website: scratch.mit.edu/microbit, or make your own!
Back to